
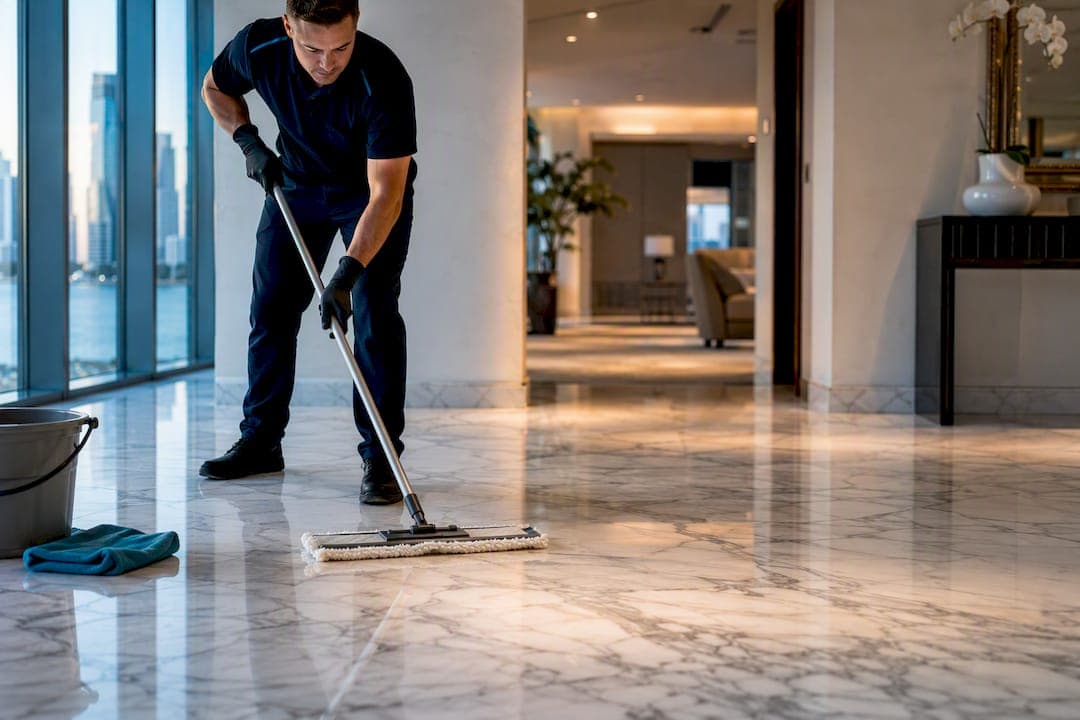
The safest way to clean a marble floor is to dry dust-mop it often enough that grit never gets the chance to scratch it, then damp-mop weekly with a pH-neutral cleaner and dry it right away. Skip vinegar, bleach, ammonia, and anything abrasive. Reseal proactively, more often in high-traffic areas, and if you see dull spots that damp-mopping won't fix, that's an etch mark, not a stain, and it may need a pro.
TL;DR:
- Regular dust-mopping with a microfiber or soft-bristle mop prevents grit from scratching marble, especially in high-traffic areas, and should be done daily or every other day.
- Damp-mopping with a diluted, pH-neutral cleaner and immediately drying with microfiber cloths preserves the finish and prevents stains and etching caused by standing water.
- Quick response to spills with blotting, flushing with water, and thorough drying minimize the risk of permanent stains or etching, particularly from acids like vinegar or citrus.
- Resilient stains may require multiple poultice applications, and deep etching or extensive damage often needs professional honing or sealing to restore the surface.
- Applying a fresh sealer every 6 to 12 months in high-traffic zones and avoiding acidic cleaners are crucial for long-term marble protection.
Table of Contents
- Marble Floor Cleaning: The Right Tools and Materials
- Daily and Weekly Marble Floor Care Routine
- How to Remove Stains From a Marble Floor
- Etch Marks vs. Stains: What's the Difference?
- How Often Should You Reseal a Marble Floor?
- Common Mistakes That Damage Marble Floors
- What Makes Marble Different From Other Flooring Materials
- Deep Cleaning Marble Floors a Few Times a Year
- How Often Should You Clean a Marble Floor?
- How to Prevent Scratches on Marble Floors
- DIY Marble Floor Cleaning vs. Professional Restoration
- Handling Spills the Moment They Happen
- When Marble Care Is Best Left to Professionals
- How Cleaning.Miami Handles Marble Floor Care
- Sources
Marble Floor Cleaning: The Right Tools and Materials
Marble is soft compared to granite or quartz, so what touches it matters as much as how often. A soft-bristle dust mop, a microfiber mop head, a couple of microfiber cloths, and a soft vacuum attachment cover almost everything you need. Set up a two-bucket rinse system for damp-mopping: one bucket with diluted cleaner, one with clean rinse water, so you're never dragging dirty water back across the stone.
Skip anything abrasive. Scouring pads, powdered cleansers, and vacuums with a spinning beater bar all leave fine scratches that dull marble's polish permanently. Steam mops are worse than they look, since the heat can warp sealant and push moisture into the stone's pores.
- Soft dust mop or microfiber flat mop for dry cleaning
- Microfiber mop head and two buckets for weekly damp-mopping
- Microfiber cloths for spot-drying and buffing
- Soft brush vacuum attachment, never a beater-bar head
- A dedicated pH-neutral stone cleaner, diluted per the label
Pro Tip: Not sure a product is safe? Dab a drop on the bottle's own cap or a hidden test spot and check the label's pH. Anything under 7 or above 10 has no business touching marble.
Daily and Weekly Marble Floor Care Routine
Grit is marble's enemy, and most of it comes in on shoes and paws. A basic rule: dust-mop daily if you have kids or pets, every other day for a quiet household with no shoes indoors. Entry mats at every door and a felt-pad policy for furniture legs cut down how much sand and dirt reach the stone in the first place.
- Dust-mop first, every time. Sweep in one direction, working toward a dustpan or door instead of scattering grit around.
- Mix your cleaner. Dilute a pH-neutral stone cleaner, or a phosphate-free dish soap in a pinch, following the label's ratio. Wirecutter's testing found dish soap's near-neutral pH makes it an acceptable stand-in when a dedicated stone cleaner isn't handy.
- Wring the mop nearly dry. Marble is porous, and standing water seeps in and can eventually cause staining or subsurface damage.
- Work in small sections, rinsing with plain water as you go so you're not spreading dirty solution across the whole room.
- Dry immediately with a clean microfiber cloth or towel. No air-drying, no leaving puddles near the baseboards.
Combining daily dust-mopping with weekly damp-mopping is the core habit that preserves a marble finish over years, not months. Homes with pets, kids, or heavy foot traffic should push toward the more frequent end of every interval in this article. If you live somewhere with hard water, finish the rinse with distilled water. It costs a few dollars a gallon and prevents the cloudy mineral film that tap water leaves behind on polished stone.
How to Remove Stains From a Marble Floor
Speed matters more than product choice here. Blot a fresh spill immediately; don't wipe it, since wiping just spreads the liquid over more surface area and gives it more pores to soak into. Flush the spot with water, then dry it completely.
Different stains call for different fixes:
- Organic stains (coffee, wine, tea, fruit juice) usually respond to a hydrogen peroxide poultice.
- Oil and grease stains need a solvent-based poultice or a few drops of ammonia mixed into a poultice paste, since water-based cleaners won't break down oil.
- Rust stains are the hardest DIY case and often need a specialty rust-removing poultice made for natural stone.
For a set-in organic stain, mix a poultice using 12% hydrogen peroxide with a few drops of ammonia, stirred into a powder like baking soda or diatomaceous earth until it forms a paste roughly the consistency of peanut butter. Spread it over the stain about a quarter-inch thick, cover with plastic wrap, tape the edges, and let it sit for 10 to 30 minutes so it can pull the stain up as it dries. Wipe it away with a plastic scraper, rinse, and dry. Repeat if the stain is still faintly visible; two or three rounds is normal for anything set-in.
Pro Tip: Never mix ammonia with bleach or with any cleaner that contains bleach; the combination produces toxic fumes. Keep your poultice ingredients simple and never combine random products under the sink.
If a stain shrugs off two or three poultice attempts, or if you're dealing with something like ink or a large rust ring, that's the point where a professional stone restorer earns their fee.
Etch Marks vs. Stains: What's the Difference?
A stain sits on top of or inside the stone and usually has color. An etch mark is chemical damage. It's the dull, sometimes ring-shaped or splotchy patch left behind after something acidic like vinegar, wine, or citrus juice touched the marble and ate into its polish. Run your finger over it. If the spot feels smooth but looks matte or cloudy compared to the surrounding shine, you're looking at etching, not a stain.
Light etching often responds to a marble polishing powder made from tin oxide or aluminum oxide. Dampen the spot, sprinkle on the powder, and buff with a soft cloth or a felt buffing pad attached to a low-speed drill, using light, even pressure in a circular motion.
- Light surface etches: polishing powder and damp buffing, done by hand
- Moderate etching across a wider area: consider a professional honing pass
- Deep etching or gouges: progressively finer diamond hone pads applied by a trained technician
Pro Tip: Uneven buffing pressure creates uneven shine, sometimes making a small dull spot into a bigger, more obvious one. If you're not confident with a buffer, practice on a hidden corner first.
How Often Should You Reseal a Marble Floor?
Sealer is what keeps spills from soaking straight into the stone, and it wears down with foot traffic and cleaning cycles. The water drop test tells you exactly where you stand: drop a tablespoon of water on the floor and watch it. If it beads up, the sealer is still working. If it darkens or absorbs within a minute or two, it's time to reseal.
Recommended intervals, based on traffic:
- High-traffic areas (entryways, kitchens): every 6 to 12 months
- Moderate-traffic rooms: every 12 to 18 months
- Low-traffic spaces: every 2 to 3 years
Homes with pets or heavy daily use should lean toward the shorter end of those windows.
- Clean the floor thoroughly and let it dry completely, at least a few hours.
- Apply an impregnating sealer with a clean applicator pad in thin, even coats.
- Wipe away excess sealer before it dries on the surface.
- Let it cure fully, usually 24 to 48 hours, before walking on it in shoes or replacing rugs.
Most homeowners are better served by an impregnating sealer, which soaks into the stone and protects without changing its look, rather than a topical wax that sits on top and needs reapplying far more often. For large rooms or commercial-grade traffic, hiring a pro to apply sealer evenly across a big area is worth the cost.
Common Mistakes That Damage Marble Floors
Most marble damage isn't dramatic. It's small, repeated mistakes that add up over months. Vinegar "cleaning hacks" from the internet are the single biggest offender. Even a diluted vinegar solution can etch marble on contact, leaving a permanent dull mark no amount of scrubbing fixes.
- Using vinegar, lemon juice, bleach, or ammonia-based glass cleaners on marble
- Running a steam mop over it, which can force moisture into the stone and damage sealant
- Scrubbing with powdered cleansers or scouring pads
- Letting spills sit "for just a minute" while you finish something else
- Vacuuming with a beater-bar attachment instead of a soft brush head
Simple habits prevent most of this: mats at every entry, felt pads under furniture legs, a no-shoes rule if your household can manage it, and trimmed pet nails. None of it takes more than a few minutes a week.
Pro Tip: Keep a small stack of microfiber cloths near the kitchen and entryway so you're never tempted to grab whatever's under the sink for a quick wipe-down.
What Makes Marble Different From Other Flooring Materials
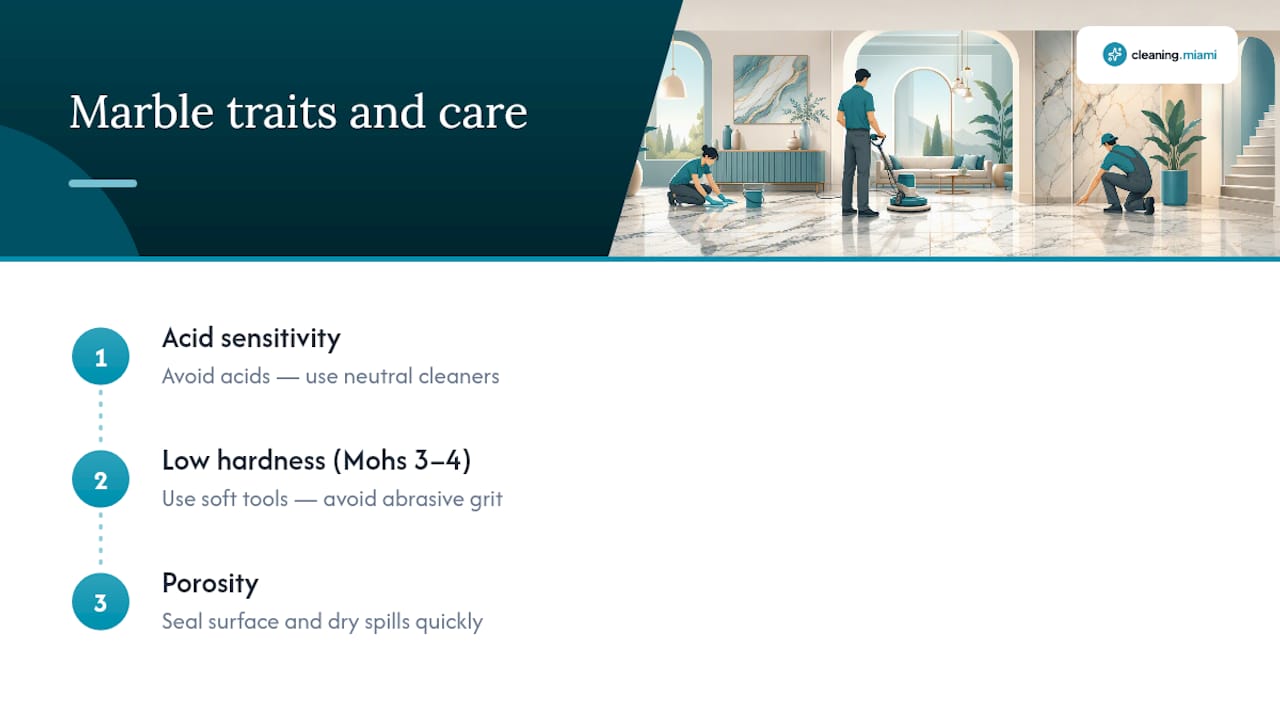
Marble behaves differently than tile, laminate, or engineered stone for one reason: it's calcium carbonate, chemically. That's the same mineral that makes up chalk and limestone, and it reacts to acid almost instantly. Anything with a pH below 7, including common kitchen staples like vinegar and lemon juice, dissolves the surface on contact and leaves a permanent dull mark called an etch. This is why the standard advice for tile floors, wipe it with an all-purpose acidic cleaner, is exactly wrong for marble.
Marble also ranks around 3 to 4 on the Mohs hardness scale, well below granite's 6 to 7. That softness is part of what gives marble its classic look, since it polishes to a deep shine, but it also means sand, grit, and even fine dust can scratch it the way sandpaper scratches wood if you drag it across the surface repeatedly.
Porosity is the third factor. Marble has microscopic pores that soak up liquid if it's not sealed, which is why a sealer and a fast response to spills matter more here than on almost any other common flooring material. Understanding these three traits, acid sensitivity, softness, and porosity, explains nearly every rule in this guide. The cleaner has to be neutral, the tools have to be soft, and the surface has to stay sealed and dry.
Deep Cleaning Marble Floors a Few Times a Year
Weekly damp-mopping keeps day-to-day grime under control, but marble benefits from a deeper pass two to four times a year, especially in kitchens, entryways, and bathrooms where soap film, cooking grease, and mineral deposits build up slowly and don't show until the shine looks flat.
A seasonal deep clean starts the same way as a weekly clean: dust-mop thoroughly first. Then mop with a slightly stronger dilution of your pH-neutral cleaner, working in small sections and rinsing more aggressively than usual with a second bucket of clean, ideally distilled, water. Pay extra attention to grout lines and corners where buildup collects, using a soft brush rather than a scrub pad.
This is also the right time to run the water drop test everywhere in the room, not just in one spot, since sealer wears unevenly depending on where furniture legs, rugs, and foot traffic sit. If several spots fail the test, that's your signal for a full reseal rather than a touch-up. It's worth checking baseboards and transitions to other flooring too, since dirt and moisture tend to collect right at those edges and get missed during routine mopping.
For larger homes or floors that haven't seen a deep clean in over a year, this is often the point where hiring a professional crew makes more sense than doing it solo over a weekend.
How Often Should You Clean a Marble Floor?
Frequency depends entirely on how much traffic the floor sees, but the baseline most stone-care guides converge on is daily dust-mopping and weekly damp-mopping, since that combination handles grit before it scratches and grime before it sets.
Here's how that breaks down by household type:
| Household type | Dust-mop | Damp-mop | Deep clean |
|---|---|---|---|
| Quiet household, no pets | Every 2 to 3 days | Weekly | 2 times a year |
| Kids or one pet | Daily | Weekly | 3 times a year |
| Multiple pets or high foot traffic | Daily, sometimes twice | Twice a week | 4 times a year |
| Entryways and kitchens specifically | Daily | Weekly, spot-clean as needed | Every 3 months |
Adjust based on what you actually see on the floor rather than sticking rigidly to a calendar. A rainy week that tracks in more mud calls for extra dust-mopping regardless of your usual schedule. The same goes for holidays with more foot traffic through the house than normal.
How to Prevent Scratches on Marble Floors
Scratches on marble almost always trace back to grit acting like sandpaper underfoot, or furniture dragged across the surface without protection. Prevention costs a lot less than repair.
Start at the doors. Mats placed both outside and inside every entry point catch the sand, gravel, and dirt that would otherwise get tracked across the floor and ground into the stone by foot traffic. Felt pads on every chair, table, and appliance leg prevent the slow scuffing that happens every time furniture gets pushed back from a table.
- Place walk-off mats at exterior doors and inside entryways
- Add felt pads under all furniture legs, checking them every few months since they wear thin
- Keep pet nails trimmed, since claws scratch marble almost as effectively as grit does
- Never drag heavy furniture or appliances across marble; lift and carry instead
- Use furniture sliders for anything too heavy to lift, like a bookshelf or sofa
High-heeled shoes deserve a specific mention here. Worn-down heel tips expose a small metal or hard plastic nub that concentrates a person's full body weight onto a tiny point of contact, which is more than enough to leave a scratch or a small indentation over time.
DIY Marble Floor Cleaning vs. Professional Restoration
Routine cleaning, dust-mopping, weekly damp-mopping, and quick stain response, is squarely DIY territory. Where the line gets blurry is restoration: deep etching, widespread dullness, scratches that go beyond the surface polish, or a floor that hasn't been resealed in years.
DIY polishing powders and buffing pads handle light, isolated etch marks reasonably well. What they can't do is match a professional honing job across an entire room. Restoration crews use progressively finer diamond abrasive pads, moving from coarse grits that level out scratches and etching to fine grits that rebuild the polish, working section by section so the whole floor ends up with a uniform finish. A homeowner tackling one bad spot with a hand buffer often ends up with a shinier patch surrounded by duller stone, which looks worse than the original problem.
Large-area resealing is the other clear hand-off point. Getting even sealer coverage across an entire kitchen or living room, without streaks, missed spots, or pooling in grout lines, takes practice most homeowners haven't had. If your floor has more than a few failed spots on the water drop test, or if etching covers a wide area rather than one or two isolated marks, it's worth getting a quote from a stone-restoration specialist before spending a weekend on it yourself.
Handling Spills the Moment They Happen
The single most damaging habit around marble isn't a wrong cleaner, it's delay. Every minute a spill sits on unsealed or under-sealed marble is a minute it has to soak deeper into the stone's pores.
The moment something spills, grab a clean cloth or paper towel and blot straight down. Don't wipe sideways, since that spreads the liquid across more surface area and pushes it toward grout lines and edges. Blot from the outside in if the puddle is large, working toward the center so you're not smearing it wider.
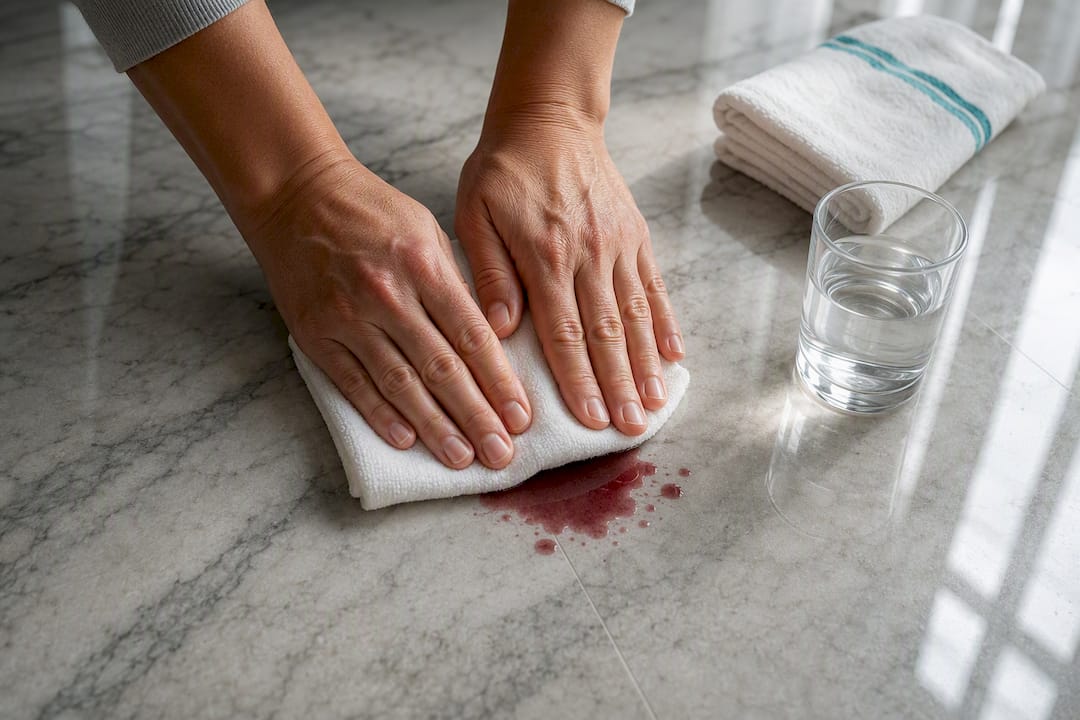
Once the bulk of the liquid is gone, flush the area with plain water and blot again, then dry it completely with a clean cloth. For anything acidic, wine, citrus juice, soda, tomato sauce, treat the flush-and-dry step as non-negotiable rather than optional, since even a brief contact window can be enough to etch the surface. If the spill happened on a spot you already know has weak sealer, from a failed water-drop test, plan to reseal that area sooner rather than waiting for the next scheduled round.
When Marble Care Is Best Left to Professionals
Routine dust-mopping and weekly damp-mopping are things any homeowner can manage. Where it gets trickier is widespread staining, resealing an entire floor evenly, or etch damage that covers more than a small spot. Those jobs reward experience: matching a honing finish across a whole room, or applying sealer-grade products correctly, is harder to get right on a first attempt than most DIY guides let on.
Professional crews carry equipment most households don't, diamond-grit polishing pads, commercial-grade impregnating sealers, and the experience to judge how deep an etch actually goes before they start grinding it out. That judgment call matters, since over-polishing one section to fix a scratch often leaves it shinier than the surrounding floor.
— Erik
How Cleaning.Miami Handles Marble Floor Care
Cleaning.Miami saves you the trial-and-error of figuring out which products are actually safe for marble in a humid, salt-air climate that's rough on natural stone. Our background-checked, insured teams use eco-friendly, pH-neutral products built for stone floors, not generic all-purpose cleaners that risk etching.

Whether you need a routine deep cleaning that includes careful marble care, prep work before a resealing job, or a one-time reset for a floor that's been neglected, our crews across Miami-Dade County know how to handle it without cutting corners. Every job is backed by a 100% satisfaction guarantee, and if you're weighing whether it's worth the cost, our pricing breakdown gives you a straight answer before you book. You can schedule a visit online in under 60 seconds and have insured pros on your floors within days, not weeks.
Sources
- How to Clean Marble Floors: The Complete Care & Maintenance Guide - D and G Flooring
- How to Clean Marble Floors of Dust, Dirt, and Stains - Bob Vila
- Cleaning Marble, Granite, and Limestone Isn’t As Difficult As You May Think | Reviews by Wirecutter
- How to Clean Marble Floors Without Harming Them - Martha Stewart