
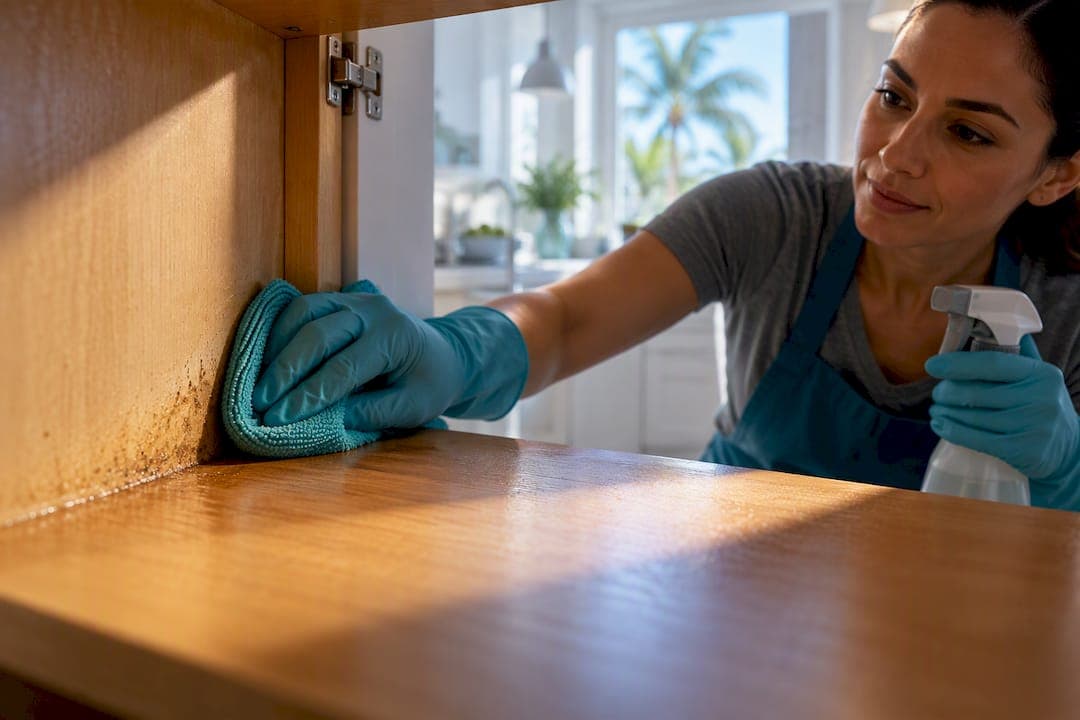
Empty the cabinet, vacuum out crumbs and dust, then wipe every surface with a barely damp cloth dipped in warm water mixed with a few drops of mild dish soap. Use a light dilution, about 1 to 2 teaspoons per quart or 4 to 5 drops per gallon, and never leave a surface wet. Rinse with a clean cloth, dry completely, and let the doors sit open for a few minutes before you put anything back.
TL;DR:
- Use a diluted mild dish soap solution of 1 to 2 teaspoons per quart of water, and always dry cabinets immediately after cleaning to prevent damage.
- Vacuum cracks, corners, and hinge tracks with a crevice attachment before applying any liquid to remove crumbs and loose debris effectively.
- For grease buildup, spray a vinegar mixture or apply a baking soda paste, avoiding abrasive tools or harsh chemicals that could damage finishes.
- Remove and replace damaged shelf liners, and store food in airtight containers to prevent pest infestations, which require physical removal of eggs and larvae.
- Deep cleaning every 3 to 6 months, with spot checks monthly, helps maintain hygiene and prevents the accumulation of grime and grease inside cabinets.
Table of Contents
- What You Need for Inside Cabinet Cleaning
- Step-by-Step: Cleaning Cabinet Interiors From Top to Bottom
- How Do You Get Rid of Grease Buildup Inside Cabinets?
- How Do You Get Rid of Cabinet Odors and Prevent Pests?
- Do Different Cabinet Materials Need Different Cleaning Methods?
- How Often Should You Deep-Clean Cabinet Interiors?
- Why Cleaning Before Disinfecting Actually Matters
- When to Clean Cabinets Yourself vs. Call a Pro
- Book Cabinet Cleaning as Part of a Full Deep Clean
- Sources
- FAQ
What You Need for Inside Cabinet Cleaning
Before you touch a shelf, gather the right supplies. Grabbing whatever's under the sink is how streaks, warped wood, and lingering soap smell happen.
- Microfiber cloths (at least two: one for washing, one for drying)
- A small bucket for mixing your soap solution
- Mild dish soap, unscented if you're sensitive to fragrance
- A handheld vacuum with a crevice attachment for corners and tracks
- A soft-bristle brush or old toothbrush for hinges and grooves
- Dry, lint-free towels for the final pass
The dilution that works for most finishes is 1 to 2 teaspoons of dish soap per quart of warm water, or roughly 4 to 5 drops per gallon if you're doing several cabinets at once, according to a cleaning guide from Specialty Kitchen. That's mild enough to protect painted, stained, and laminate surfaces while still cutting through everyday grime.
Crack a window or turn on the exhaust fan while you work, especially if you're using vinegar or a degreaser. Wear gloves if your skin reacts to dish soap or cleaning solutions, and always test any cleaner on a hidden spot inside the cabinet first. Some finishes react badly to products that work fine elsewhere in your kitchen.
Step-by-Step: Cleaning Cabinet Interiors From Top to Bottom
Work one cabinet at a time. Trying to tackle the whole kitchen in one pass usually ends with half-emptied shelves sitting on your counter for three days.
- Empty and sort. Pull everything out and set it on a towel-lined counter. Toss anything expired, and inspect for signs of pantry pests, like small holes in packaging or a faint musty smell.
- Strip the liners. If you use shelf liners, pull them out now. Damaged or curling liners get replaced later, not reused.
- Vacuum first. Run a crevice attachment along every seam, corner, and hinge track before any liquid touches the wood or laminate. This is the step people skip, and it's the one that catches crumbs a wet cloth just smears around.
- Wring, don't soak. Dip your microfiber cloth in the soap solution, then wring it until it's barely damp. A dripping cloth is the fastest way to warp particleboard or swell a wood seam.
- Wipe top to bottom. Start at the top shelf and work down so drips land on surfaces you haven't cleaned yet, not ones you've already finished. Use the toothbrush for tight corners and hardware.
- Rinse and dry immediately. Go back over every surface with a clean, damp cloth to lift soap residue, then dry thoroughly with a lint-free towel. Leaving cabinets even slightly damp invites mildew, especially in humid climates.
- Air out before restocking. Prop the doors open for 10 to 15 minutes so any trapped moisture escapes before you put items back.
Pro Tip: Keep a dry towel folded on the counter the entire time you're working. Every time you rinse a surface, dry it within a minute or two. That single habit prevents almost every warping and mildew problem people run into with interior cabinet cleaning.
This basic sequence, empty, vacuum, wash with mild soap, rinse, dry, matches what most consumer cleaning guides recommend, and it works whether you're cleaning one cabinet or a whole kitchen's worth.
How Do You Get Rid of Grease Buildup Inside Cabinets?
Grease near the stove or under the sink usually needs more than soap and water. A 50/50 mix of water and white vinegar in a spray bottle cuts through greasy film on most non-sensitive surfaces. Spray, let it sit for a minute, wipe, then rinse and dry right away so vinegar doesn't sit on the finish longer than it needs to.
For thick, baked-on residue, a baking-soda paste works better than scrubbing harder. Mix baking soda with a small amount of water until it's a spreadable paste, apply it with a soft cloth, and use gentle circular motions rather than pressure. Never reach for a scouring pad. Abrasive tools strip finish faster than grease ever will.
- Spray, wait, wipe: vinegar solution for daily grease film
- Paste, sit, buff gently: baking soda for stubborn buildup
- Avoid bleach and ammonia inside food-storage cabinets; the fumes linger and the residue isn't food-safe
- If a shelf is removable and the finish allows it, a sink soak handles grease a cloth can't
Reach for a commercial degreaser only as a last resort, and only on hardware or metal, not on wood or laminate interiors where cabinets store food.
How Do You Get Rid of Cabinet Odors and Prevent Pests?
Odor and pests are two different problems, and cleaning solves only one of them. No spray or wipe-down removes pantry pest eggs already laid on stored food. The only reliable fix is removing infested items and vacuuming every crack and crevice where eggs or larvae hide, according to guidance from Michigan State University Extension.
- Discard any package showing holes, webbing, or a musty smell, don't just toss the food and reuse the box
- Vacuum crevices thoroughly since disinfectant wipes won't reach eggs tucked into seams
- Store flour, grains, cereal, and pet food in airtight glass or plastic containers going forward
- If you suspect an infestation in a salvageable dry good, freezing it for several days or a brief low-heat oven treatment can kill hidden eggs
For lingering smells with no pest involved, an open box of baking soda, a small dish of coffee grounds, or a pouch of activated charcoal left inside for a few days usually absorbs odor on its own. None of this replaces the basic principle: cleaners manage surfaces, not infestations already inside your food.
Do Different Cabinet Materials Need Different Cleaning Methods?
Yes, and using the wrong method is how people ruin a perfectly good finish. A technique that's fine on laminate can dull painted wood or lift a varnish seal.
- Painted cabinets: Use minimal water and a soft cloth. Skip citrus-based cleaners and anything abrasive. They dull paint faster than grease dulls it.
- Stained or varnished wood: Stick to water-based cleaners only. Oil-based products can leave a film, and any moisture needs to be dried immediately to prevent the wood from swelling at the seams.
- Laminate and melamine: Generally tolerate diluted vinegar or an all-purpose cleaner well, but test an inconspicuous spot first since some coatings react differently.
- Metal trim and hardware: Dry immediately after cleaning to avoid water spots, and add a drop of lubricant to hinges afterward if they've started to squeak.
How Often Should You Deep-Clean Cabinet Interiors?
Quick maintenance beats letting grime build up until it needs a major effort. A monthly spot check, wiping down shelves near the stove or under the sink where spills happen most, keeps things from ever reaching the deep-clean stage.
A full interior deep clean is worth doing every 3 to 6 months for most households, based on cabinet-care guides and consumer cleaning resources, though households that cook daily with a lot of oil may want to move that up to every three months.
- Wipe up oil or syrup spills the moment they happen, not at the next scheduled cleaning
- Check under-sink cabinets seasonally for slow leaks that cause swelling or mold
- Replace shelf liners once they're damp, curling, or stained
- Keep cabinet doors closed when not in use, and realign hinges if doors don't sit flush, since gaps let dust and grease drift in faster
Closing doors properly and fixing a misaligned hinge sounds minor, but it measurably slows how fast grease and dust accumulate inside, according to RD.com's cabinet cleaning guide.
Why Cleaning Before Disinfecting Actually Matters
The CDC is clear on this: clean first, then disinfect if needed. Dirt and grease physically block disinfectants from reaching germs, so spraying a dirty shelf wastes product and does almost nothing. That's why the soap-and-water sequence, wipe, rinse, dry, isn't just about appearances. It's what makes any follow-up disinfecting step actually work, and it's consistent with the exact dilution ratios used throughout this guide.

When to Clean Cabinets Yourself vs. Call a Pro
Routine cabinet cleaning and moderate grease are well within DIY territory; the steps above handle both. Long-standing grease buildup, visible mold, or an active pest problem is where a professional earns their fee, since those issues often need equipment and treatments beyond a sponge and vinegar. Most deep cleaning services already include interior cabinet detailing as standard, which is worth knowing before you commit to a weekend of scrubbing.
— Erik
Book Cabinet Cleaning as Part of a Full Deep Clean
Cleaning.Miami's deep cleaning service covers interior cabinet detailing as part of the job, not as an upsell. If you're moving, our move-in and move-out cleaning also handles cabinet interiors top to bottom, and Airbnb hosts get the same detail built into every vacation rental turnover.

There's no contract to sign and no long hold on the phone. Get a quote through Cleaning and book a time that works for your kitchen, not ours.
Sources
- 8 cleaning hacks that will make your kitchen cabinets look brand new
- Control pantry pests
- When and how to clean and disinfect your home
- How to clean kitchen cabinets in 9 easy steps
FAQ
What Should I Clean the Inside of My Cabinets With?
A mild dish soap and warm water solution works for nearly every cabinet material. Mix about 1 to 2 teaspoons per quart or 4 to 5 drops per gallon, wring your cloth until barely damp, and always rinse and dry afterward.
How Do I Clean Inside Kitchen Cabinets Without Damaging the Finish?
Empty the cabinet, vacuum out debris, then wipe with a lightly damp cloth using diluted dish soap rather than soaking the surface. Rinse with a clean cloth and dry immediately, since trapped moisture is what actually damages painted or wood finishes, not the soap itself.
How Can I Refresh the Inside of Kitchen Cabinets That Smell Musty?
Vacuum the interior thoroughly first, since crumbs and residue feed odor. Then place an open box of baking soda, a small dish of coffee grounds, or activated charcoal inside for a few days to absorb lingering smell.
Can I Use Clorox Wipes Inside Cabinets?
Disinfecting wipes are fine on hard, sealed surfaces like laminate, but they shouldn't replace a soap-and-water clean first, since dirt and grease reduce how well disinfectants work. Avoid them on unsealed or painted wood, where the chemicals can dull or discolor the finish over time.